Difference between revisions of "Modding"
| Line 18: | Line 18: | ||
<H3>Channel F II</H3> | <H3>Channel F II</H3> | ||
| − | [[File:Channel F II composite video modification overview.jpg|439px]] [[File:Channel F II composite mod detail.jpg|300px]] <br><br>[[File:Channel F II composite | + | [[File:Channel F II composite video modification overview.jpg|439px]] [[File:Channel F II composite mod detail.jpg|300px]] <br><br>[[File:Channel F II composite video modification jumper.jpg|434px]] [[File:Channel F II mod Composite points.jpg|420px]] <br><br>[[File:Channel F II composite mod audio.jpg|320px]] [[File:Channel F II mod voltage divider.jpg|470px]] <br> |
| − | + | ||
<br> | <br> | ||
| + | 5V can be picked directly from the capacitor, here connected with red and blue wires in top right position of the circuitboard. <br> | ||
| + | One of the locations for composite signal source has been hooked up with a red clamp on a resistor by the LED. <br> You can lift the jumper in the green circle to improve video quality. <br> | ||
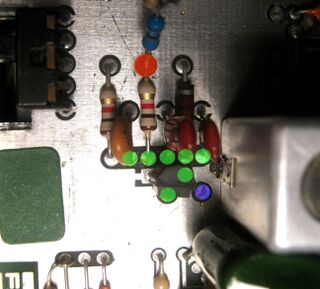
| + | Optional composite video hookup points are shown with green dots around that jumper. Audio hookup points are located to the right of the channel switch. <br> | ||
| + | Green/blue dots has a low level audio signal, red one has TTL levels and need to be lowered to be used. Using the low level without R8 may cause image interference.<br> | ||
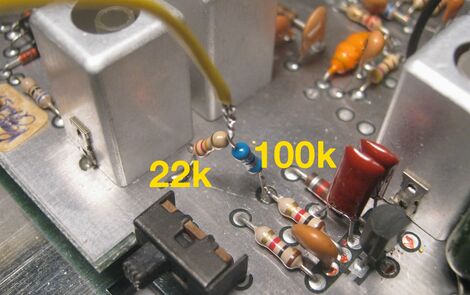
| + | I used a voltage divider with 22kOhm and 100kOhm on that red marker (TTL level audio) to get to what the RF hookup uses. <br> | ||
| + | Using the voltage divider means that you can skip R8 in the schematic and connect audio signal between R8 and C3.<br> | ||
<br> | <br> | ||
<H3>SABA Videoplay 2</H3> | <H3>SABA Videoplay 2</H3> | ||
Revision as of 16:34, 2 April 2021
Contents
System Fairchild composite video modification
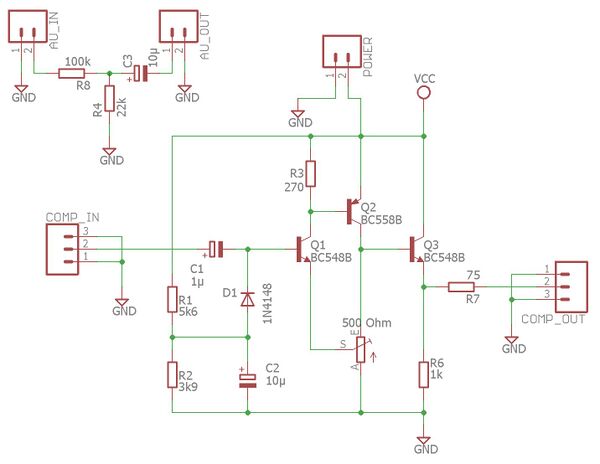
Working mod schematic
Construction can be used for many other machines as well.
Example PCB
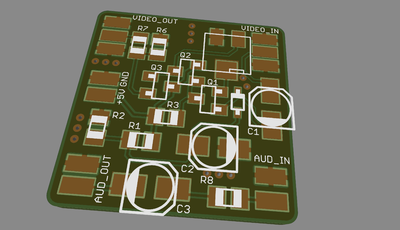
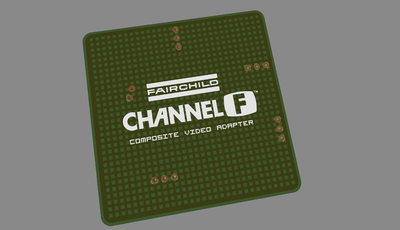
Example of PCB using SMD components.
Hookup
Fairchild Video Entertainment System / Channel F
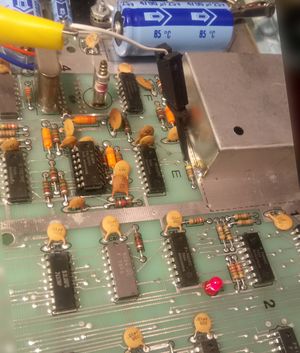
Connect composite in wire to the resistor by the RF box where the black clamp is placed. Audio can be picked from speaker output using about 150kOhm in series.
Channel F II
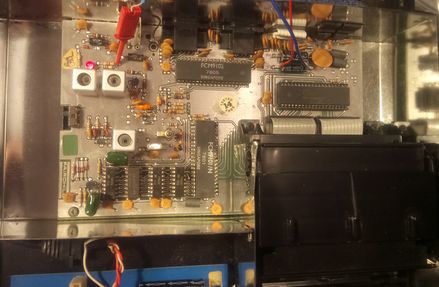
5V can be picked directly from the capacitor, here connected with red and blue wires in top right position of the circuitboard.
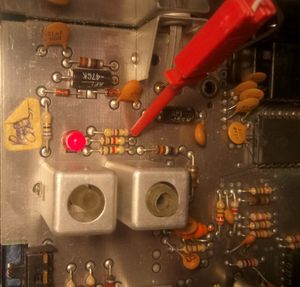
One of the locations for composite signal source has been hooked up with a red clamp on a resistor by the LED.
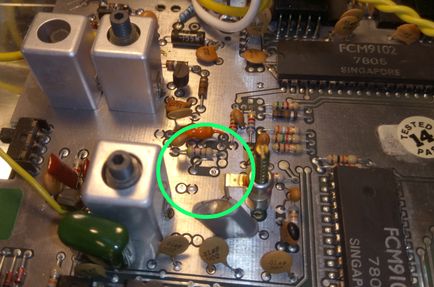
You can lift the jumper in the green circle to improve video quality.
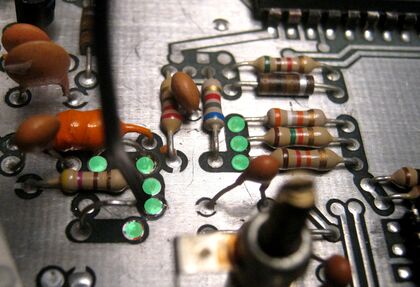
Optional composite video hookup points are shown with green dots around that jumper. Audio hookup points are located to the right of the channel switch.
Green/blue dots has a low level audio signal, red one has TTL levels and need to be lowered to be used. Using the low level without R8 may cause image interference.
I used a voltage divider with 22kOhm and 100kOhm on that red marker (TTL level audio) to get to what the RF hookup uses.
Using the voltage divider means that you can skip R8 in the schematic and connect audio signal between R8 and C3.
SABA Videoplay 2
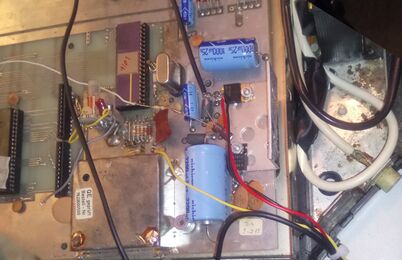
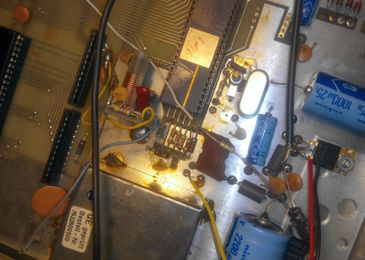
In this example 5V and ground is hooked up directly to the 5V regulator, video is taken from capacitor pin (yellow wire).
The white wire from the speaker is originally connected to the little RF board, connect it to the PCB instead.
In the image you see audio hooked up with a loose resistor and capacitor instead of using the PCB.
